创建Maven项目和Spring IOC实例过程解析
这篇文章主要介绍了创建Maven项目和Spring IOC实例过程解析,文中通过示例代码介绍的非常详细,对大家的学习或者工作具有一定的参考学习价值,需要的朋友可以参考下
把如何创建Maven项目和创建Spring IOC的例子分享给大家,希望能对大家有帮助!
一、创建Maven项目
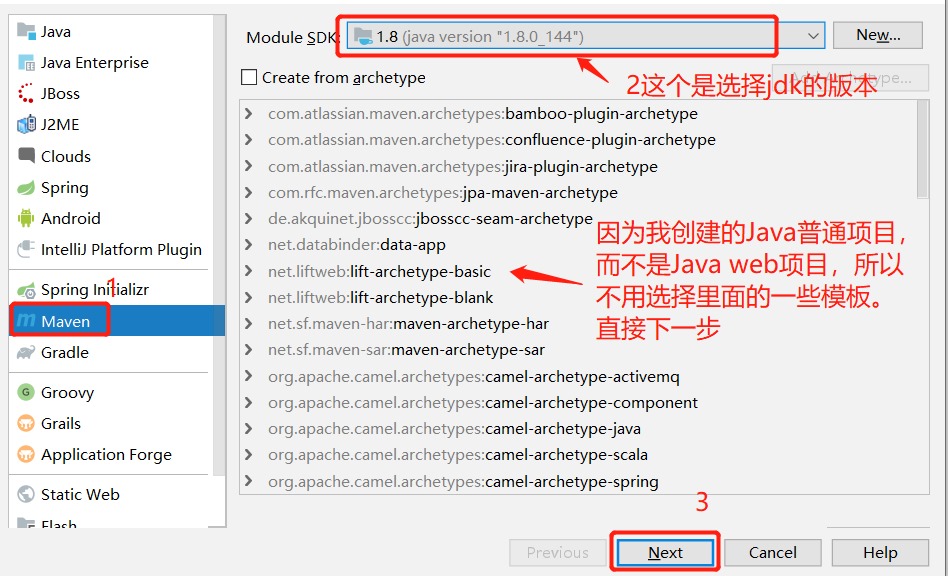
我用的是Intellij IDEA开发工具创建Maven项目的,打开该软件后,直接点击file --->project,如下图所示,
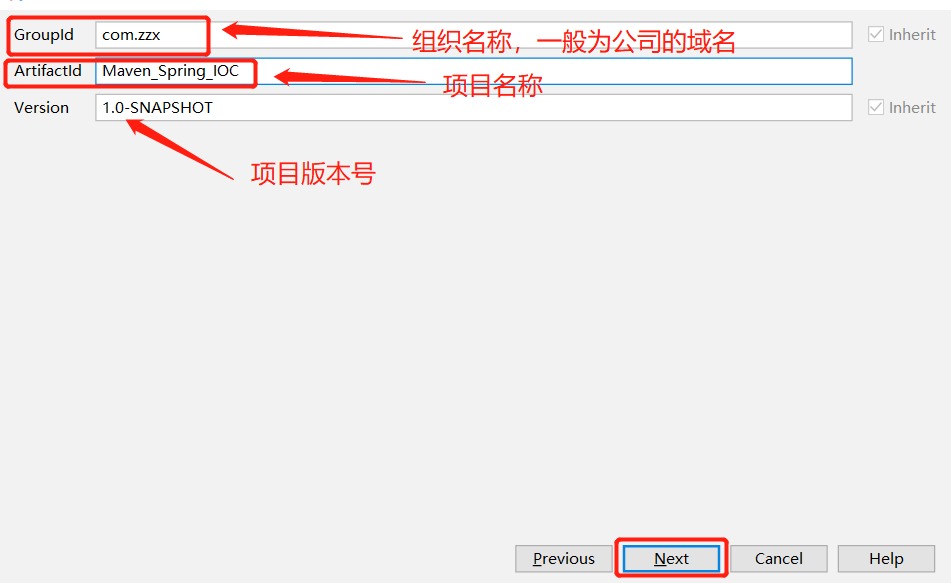
然后就直接跟着我的图片的步骤往下走。
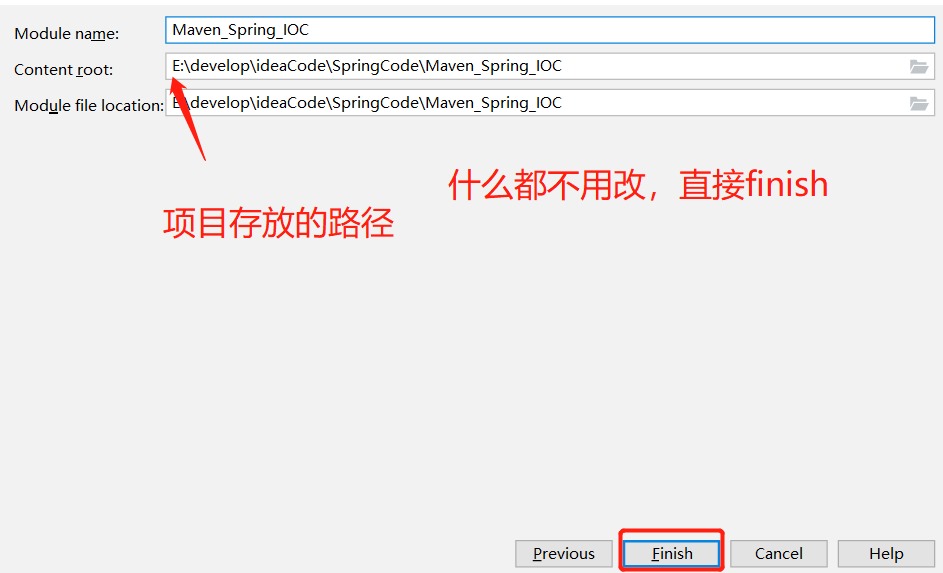
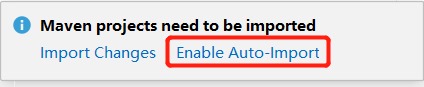
到了这一个就创建好了Maven项目了,然后开发工具会在右下角提示下图的信息,直接点击自动导入就好。

然后就导入Spring IOC的项目依赖,可以去这个网站查找Maven依赖查找。然后在pom.xml文件先导入下面的依赖。
<dependencies>
    <!-- https://mvnrepository.com/artifact/org.springframework/spring-context -->
    <dependency>
      <groupId>org.springframework</groupId>
      <artifactId>spring-context</artifactId>
      <version>4.3.12.RELEASE</version>
    </dependency>
    <dependency>
      <groupId>junit</groupId>
      <artifactId>junit</artifactId>
      <version>4.12</version>
      <scope>test</scope>
    </dependency>
  </dependencies>
  <build>
    <plugins>
      <plugin>
        <groupId>org.apache.maven.plugins</groupId>
        <artifactId>maven-compiler-plugin</artifactId>
        <configuration>
          <source>1.8</source>
          <target>1.8</target>
          <encoding>UTF-8</encoding>
        </configuration>
      </plugin>
    </plugins>
  </build>

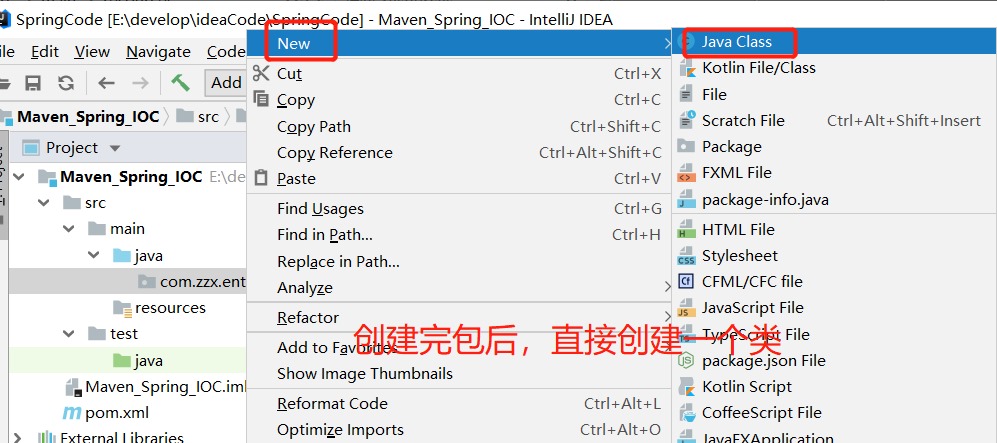
导入依赖后就创建包,创建包是为了更好的去管理Java类,创建好包之后就直接创建类,创建包和类的命名遵从Java命名规范即可。

创建好Student类后,然后在resources文件夹里面直接创建applicationContext.xml文件,最后在test下的java下创建一个包,在创建一个测试类,具体代码如下:
Student.java
package com.zzx.entity;

public class Student {
  private Integer id;
  private String name;
  private Integer age;
  private Integer sex;
  private String address;
  public Integer getId() {
    return id;
  }
  public void setId(Integer id) {
    this.id = id;
  }
  public String getName() {
    return name;
  }
  public void setName(String name) {
    this.name = name;
  }
  public Integer getAge() {
    return age;
  }
  public void setAge(Integer age) {
    this.age = age;
  }
  public Integer getSex() {
    return sex;
  }
  public void setSex(Integer sex) {
    this.sex = sex;
  }
  public String getAddress() {
    return address;
  }
  public void setAddress(String address) {
    this.address = address;
  }
  @Override
  public String toString() {
    return "Student{" +
        "id=" + id +
        ", name='" + name + '\'' +
        ", age=" + age +
        ", sex=" + sex +
        ", address='" + address + '\'' +
        '}';
  }
}
applicationContext.xml
<?xml version="1.0" encoding="UTF-8"?>
<beans xmlns:xsi="http://www.w3.org/2001/XMLSchema-instance"
    xmlns="http://www.springframework.org/schema/beans"
    xmlns:context="http://www.springframework.org/schema/context"
    xsi:schemaLocation="http://www.springframework.org/schema/beans http://www.springframework.org/schema/beans/spring-beans.xsd http://www.springframework.org/schema/context http://www.springframework.org/schema/context/spring-context.xsd ">
  <!-- 把一个对象放进Spring容器 -->
  <bean name="s1" class="com.zzx.entity.Student">
    <property name="id" value="1"></property>
    <property name="name" value="小红"></property>
    <property name="age" value="18"></property>
    <property name="sex" value="2"></property>
    <property name="address" value="中国"></property>
  </bean>
  <!-- 把另一个对象也放到spring容器中,对象的名字不能重复,否则运行会报错 -->
  <!-- 用property设置对象的属性,那该对象要有setter方法,还要有一个无参数的构造方法 -->
  <bean name="s2" class="com.zzx.entity.Student">
    <property name="id" value="2"></property>
    <property name="name" value="小白"></property>
    <property name="age" value="16"></property>
    <property name="sex" value="1"></property>
    <property name="address" value="中国"></property>
  </bean>
</beans>
Test01.java
package com.zzx.ioc;

import com.zzx.entity.Student;
import org.junit.Test;
import org.springframework.context.support.ClassPathXmlApplicationContext;

public class Test01 {
  @Test
  public void studentTest(){
    ClassPathXmlApplicationContext applicationContext = new ClassPathXmlApplicationContext("applicationContext.xml");
    Student s1 = applicationContext.getBean("s1", Student.class);
    Student s2 = applicationContext.getBean("s2", Student.class);
    System.out.println(s1);
    System.out.println(s2);
  }
}
最后,直接运行程序,这样一个简单的Spring IOC结合Maven的项目就完成了。

结尾
以上就是本文的全部内容,希望对大家的学习有所帮助,也希望大家多多支持呐喊教程。
声明:本文内容来源于网络,版权归原作者所有,内容由互联网用户自发贡献自行上传,本网站不拥有所有权,未作人工编辑处理,也不承担相关法律责任。如果您发现有涉嫌版权的内容,欢迎发送邮件至:notice#nhooo.com(发邮件时,请将#更换为@)进行举报,并提供相关证据,一经查实,本站将立刻删除涉嫌侵权内容。
- HTML基础教程
- HTML5基础教程
- HTML参考手册
- SVG 教程
- CSS 教程
- CSS 参考手册
- CSS3教程
- Bootstrap3 教程
- Bootstrap4 教程
- Font Awesome图标
- JavaScript 教程
- JavaScript 参考手册
- jQuery 教程
- AJAX 教程
- JSON 教程
- AngularJS 教程
- ReactJS 教程
- NodeJS 教程
- Python 教程
- C++ 教程
- Golang 教程
- C 语言教程
- PHP 教程
- C# 教程
- LINQ 教程
- Lua 教程
- Ruby 教程
- Rust 教程
- Linux 教程
- R 语言教程
- Docker 教程
- Scala 教程
- MatLab 教程
- Erlang 教程
- Pandas教程
- Numpy教程
- Matplotlib教程
- Flask教程
- Java 教程
- SpringBoot 教程
- JDBC 教程
- JSP 教程
- Servlet 教程
- Maven 教程
- Spring 教程
- Django 教程
- Swift 教程
- Kotlin 教程
- SQL 教程
- MongoDB 教程
- SQLite 教程
- PostgreSQL 教程
- MySql 教程
- Redis 教程
- Elasticsearch 教程
- 这样回答继承可能面试官更满意
- java实现模仿斗地主发牌
- ASP.NET Core3.X 终端中间件转换为端点路由运行详解
- .NET Core3.1发布(翻译)
- Pandas时间序列重采样(resample)方法中closed、label的作用详解
- jquery实现弹窗(系统提示框)效果
- 微信小程序 this.triggerEvent()的具体使用
- jQuery实现消息弹出框效果
- java中Collections.sort排序详解
- Python3的unicode编码转换成中文的问题及解决方案
- opencv3/C++图像边缘提取方式
- 解决idea中Springboot找不到BASE64Encoder或Decoder的jar包
- opencv3/C++视频中叠加透明图片的实现
- opencv3/C++ 将图片转换为视频的实例
- 用OpenCV将视频分解成单帧图片,图片合成视频示例
- 创建Maven项目和Spring IOC实例过程解析
- jQuery实现弹出层效果
- 浅谈go中defer的一个隐藏功能
- python3 webp转gif格式的实现示例
- Spring Cloud Feign高级应用实例详解
- javascript实现弹出层效果
- element表格翻页第2页从1开始编号(后端从0开始分页)
- flask 使用 flask_apscheduler 做定时循环任务的实现
- 使用opencv将视频帧转成图片输出
- 微信小程序实现注册登录功能(表单校验、错误提示)